Friday, December 22, 2017

Week #15 Final Post

Final Thoughts About Multimedia Apps and Tools


Applied Learning

Before taking this course, I took the online environment for granted, and did not fully realize what opportunities were available right in front of me.In the past, I was content with using the internet for basic things such as browser searches and social media visits, but I am now confident in my ability to create my own content instead of looking at everyone else's, and feeling like I could never do that. This course not only showed me what was available online, but also gave me the experience to apply it in my own life. 

Some of the most important things I learned how to do were quickly and easily set up websites and blogs. I also learned how to create and edit videos and audio recordings using multiple web applications. I created, edited, and shared multimedia using Google apps such as Google Sites, Google Slides, Google Docs, and Youtube. I also learned how to use online photo editors such as Pixlr and PicMonkey, as well as create, edit, and upload audio recordings using Soundtrap and SoundCloud.


Challenges

The thing I enjoyed most about this class is how it forced me out of my comfort zone.This was particularly true when it concerned the screencasting and voice recordings. Though I was nervous and self conscious at first, by Week #15 I felt much more comfortable in front of an online audience and I felt like I could use this new confidence to better myself. This class made me so excited about furthering my life using the internet that I decided I want to try freelance writing for a platform like BlogMutt. During Week #5 I also learned that Google Apps far outweigh Microsoft Apps in terms of user friendliness and available features. Before taking this course I was fully committed to Microsoft Office, but now I rarely use it.

Along with providing me with valuable learning experiences, this course taught me a valuable lesson about being dedicated even when things seem impossible. Throughout this course the overtime at my job was brutal, for lack of a better word. I was working 6 or 7 days per week up to 70 hours, and I really began feeling it around Week #9 when my department abruptly became short staffed. At this point I was working 12 hours per day, six days per week. After all of this, and all that I gained from this class, I was happy to catch up a little and complete my final project.

Final Project

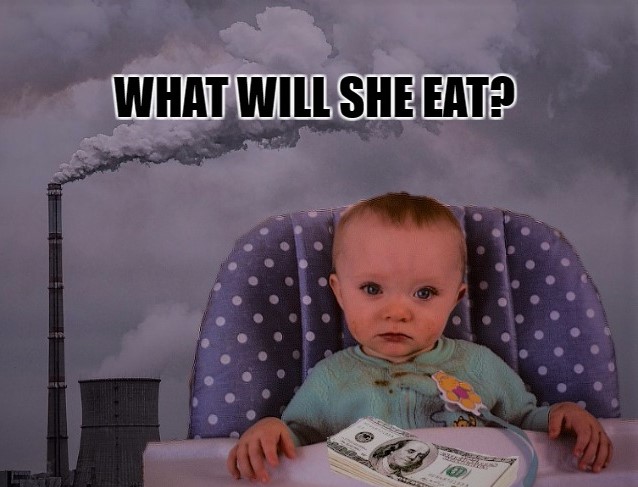
For my final project the first thing I did was choose the type of photo story I wanted to create and I wound up choosing education. I then chose my topic by considering the two most important things to me, philanthropy and the environment. This led me to type up a story on world hunger and conserving food. After this, I collected facts from the Environmental Protection Agency and applied strategies that I already use in my own life like composting and freezing food. I also collected images from Flickr, Pixabay, and Wikimedia Commons and stored them in my Google Drive. Finally, I recorded my story using WeVideo's mic, and added in transitions and text overlays. Here is my final project:


Thursday, December 14, 2017

Week #10 Prezi Presentation


My First Prezi


This week I had the opportunity to use Prezi for the first time. Though I was nervous to try a new presentation app, I was pleasantly surprised to find that Prezi is even easier to use than PowerPoint. I didn't have access to Prezi's premium features, but I enjoyed using the basic features because it encouraged me to keep my presentation simple. After looking through the Prezi staff picks for inspiration, I decided that a presentation on outer space would be the best way to show off Prezi's zoom animation, which is my favorite feature in the application. I also noticed that Prezi can be very effective for connecting ideas in a visual way, so I built on this by making my entire presentation resemble a solar system. I made the central idea (the Sun of the solar system) about the universe, and the objects in it were represented by planets in orbit.

Applying Garr Reynolds Design Tips


I made sure to keep my Prezi simple by keeping my text to a minimum and only including the most important and compelling information. I also gave my presentation its own unique visual theme, though I did select a Prezi background because it went well with my topic. For a font, I used NotoSans because it is both professional looking and easy to read. Recognizing the importance of logical progression, I designed my presentation to move from the largest objects in the universe to the smallest ones.


Week #9 Presentations

Making a Strong Presentation


As I quickly learned this week, making a powerful presentation is not an easy task. It requires not only careful planning, compelling information, and powerful images, but also the use of many other strategies that keep the audience engaged. From Garr Reynolds Tips for Delivery, this means having a good attitude, being direct, and keeping the lights on.

I applied these delivery tips and Garr Reynolds Tips for Design to my own presentation by maintaining eye contact with the webcam (audience), keeping my presentation short with no bullet points, and choosing a topic that I am passionate about. I also used powerful and thought provoking images and facts in each slide.

Admittedly, making a presentation, even if it wasn't directly in front of an audience, was very difficult for me because I have always had stage fright. Presenting online through Screencastify actually made this situation worse for me because I was able to look at myself during the presentation and pick apart my word choices, tone of voice, and body language. Despite the difficulties of this assignment, I believe that it was an excellent learning experience for me because I now know what parts of my presentations could use improvement. I found watching my own presentations to be so helpful that in the future I will probably record myself prior to making a physical presentation.

Sunday, October 29, 2017

Week #7 Creativity and Photo Stories

Reflections on Creativity and Making Photo Stories


Creativity

This week I learned what it means to be truly creative in a society that molds us to think a certain way from the time we are children. From grade school, we are trained for standard professions like factory work and teaching by sitting quietly for 7-8 hours 5 days per week and reiterating what is written in textbooks and on chalkboards.  We are encouraged to pay attention to subjects that do not interest us, trained to answer questions and complete assignments exactly the way instructors tell us to, and taught that the most intelligent among us are those who get the highest marks on standardized tests. 

After listening to Sir Ken Robinson speak about creativity I thought about how important it is for people to pursue what brings them happiness and not live in fear of making mistakes. People are most productive when they are doing what they love and some of the best inventions were created on accident by people who did what they were passionate about without fear of failure. http://list25.com/25-accidental-inventions-that-changed-the-world/ 

While thinking about what it means to be creative, and how people tend to be more productive when doing the activities they enjoy the most, I found an interesting TED Talk on the concept of flow. Flow is a mental state characterized by complete immersion and focus on an activity that is being performed with great precision.


While I believe dedication to activities that bring us joy and a sense of purpose are important for mental well being, I also believe that taking a step outside of one's comfort zone and trying new things are also an extremely important part of being creative. This Multimedia Apps and Tools class has played a major role in enhancing my own creativity recently because it has forced me to use online apps to create and publicize unique videos, audio, and images- something I never would have had the confidence to do on my own. Since I've always wanted to start an online business or have a popular blog, I'm hoping that one day I'll be skilled enough to be in a state of "flow" while creating online content and that I'll be creative enough to make something that people will want to look at.

Making my Photo Story

Speaking of trying new things, I got to make my first photo story in WeVideo this week. To get a good idea of how images can be ordered and manipulated to create a captivating story, I looked through the stories on The Boston Globe. After looking at several stories on natural disasters, war, and pollution, I decided that my favorite photo story was the one on the graduates of 2017 because it was the most uplifting and inspiring. The photos were incredibly inclusive and full of people from all walks of life. They gave me the feeling that even in my current circumstances, I will be able to get my degree.

After deciding that I like uplifting photo stories the most, I chose to use images of myself enjoying time spent with my fiance and my best friend at the Great Escape. After some technical difficulties, I was able to create an account with Google Plus and create a video in the F17 Photo Stories folder. Following along with the video tutorial, I added my photos in an order that showed how I spent my day at the park. I also incorporated a festive title and an old film countdown, as well as upbeat music entitled "Chasing the Dream" from WeVideo's audio selection. After adding page flip transitions, a spooky sound effect, and a fade out to my music, my photo story was complete.


Tuesday, October 17, 2017

Week # 6 Blog on Audio Recording and Video Hosting

Reflections on YouTube, SoundCloud, and Free Online Audio


Exploring YouTube

This week I took advantage of the opportunity to explore YouTube's privacy features more than I ever have before. I was amazed at YouTube's capabilities, and though I have always been more of a video viewer than a creator, I was a little embarrassed that I have been using YouTube for 8 years without fully knowing how it works. So just for fun, and to make myself more media literate, I uploaded my first YouTube video ever which was a video of me playing my favorite game, Fallout 4. Upon doing this I edited my settings so that viewers can rate and comment on the video. Here is my video (contains graphic content) and the link to my channel https://www.youtube.com/user/killerclowns871. Amusingly, the name I gave my channel when I was 13 (after the movie Killer Klowns from Outer Space) stuck around in my channel's url. 


I also discovered that I can make uploaded videos private or public and remove ads from my videos. Digging even further, I learned that I can use Google Ads Settings to make it so I'm not targeted with ads based on my browser history. Preventing Google from targeting me with ads will make my future internet browsing feel more enjoyable and less imposing.

 Editing Audio in Soundtrap

This week was a week of firsts for me as I also got to make my first ever edited audio recording using Soundtrap. This was a fun assignment for me and I enjoyed all of the different effects, layering and sound cropping that are possible with Soundtrap. I experimented with different volumes for each of my sounds and different effects for my voice such as the resonating "cave" effect and the crisp and clear "clean" effect. After trying many different kinds of music and sounds to blend with the intensity of the poem"The Tyger", I truly learned just how much audio can make or break otherwise compelling content.

 Discovering Free Audio

To find the audio for my Soundtrap recording I explored YouTube's audio gallery along with the other copyright free audio sites listed in the assignment for week 6. I found that many of these websites contained music and ambiances rather than actual sound effects, so I sought out a copyright free website where I could find just the audio I was looking for and came across freesound.org. This website contains all kinds of recorded sounds that fall under Creative Commons, and many are free for use with or without attribution.

Sunday, October 8, 2017

Week # 4 Blog Design and Website Platforms

My New Blog Design and Website


After learning about good and Bad Blog Design this week, I began to notice all of the ways that my design was not very effective. For example, my fonts and images often were not sized appropriately, my text was too cramped, and I had several typos and poorly written sentences all of which took away from the message of my posts. I also had a shameful amount of beginner mistakes such as underlining things that weren't links, and *blush* having light text on a dark background. Using my knew knowledge of white space, the importance of drawing attention to content, and the role of colors from 5 Keys to Make Your Blog Visually Awesome, I made several changes to my blog.

First Impressions

The first thing I did was change the theme and images in my blog because those are the things that viewers will see immediately. I decided on a simple theme: A white text background on a library webpage background. This was because my previous theme and background were too distracting, and unrelated to the blog's message. Next, I made my images smaller so that they fit nicely with the text, without taking attention away from it. After realizing that I had been sizing everything based on my huge 17 inch laptop screen, I also adjusted the width of my blog to make it more compatible with smaller computer screens and mobile devices.

Text Content

After fixing the general appearance of my blog, I made sure the font types, sizes, and colors were all uniform in each of my blog posts. I also got rid of the cramped appearance of my text by spacing the lines and paragraphs neatly. Next, I fixed the text size organization in my blog by making headings the largest, followed by subheadings and content. Taking advice from 5 Beginning Blogging Mistakes You Can Fix, I got rid of anything that said "click here", and just kept the links.

Layout and Gadgets

To improve ease of access, I followed the design of other attractive blogs and put the search bar and blog archive on the right sidebar. I kept other information viewers might want such as my profile information, number of views, and a link to report abuse in the footer, so that it wouldn't be a distraction.

My Google Site

This part of the assignment proved difficult for me because I am accustomed to using HTML and WordPress to make websites. Once I watched the Google Sites tutorial and played around with the features for a while I was able to make a cool website that I think looks great on mobile devices. Using the tutorial, I gave my homepage a header image with a welcome message, a link to Nasa with a map, a calendar, and links to my other pages. In my other pages I added captioned and clickable images, text content and a video. Here's the link:


Monday, September 25, 2017

Week #3 Blog on Media Literacy and Photo Editing


Media Literacy and Powerful Images


This week I learned about the specifics of media literacy. It wasn’t too difficult for me to grasp this concept as I have been “media literate” for most of my life. Someone who is media literate can evaluate, access and create media on many different platforms using many different apps. Media literacy is important because it makes people better equipped to obtain reliable information, work, and interact with one another in the modern world. 

One thing I noticed about media literacy is that it increases with time, given that a person continues using and interacting with media. An example is social media. If one hadn’t been involved in social media since the early 2000’s he might wonder what had happened to all of his friends on Myspace and would likely have no idea what a meme was. This may sound funny, but such a lack of media literacy would likely make it extremely difficult for a person to interact with others in the modern world. The same is true of computer software such as Microsoft Office, anti-malware, and image editors like Adobe Photoshop. If you don’t keep them up to date and learn about similar programs, they are no longer relevant and likely will not function properly on certain platforms.

After watching the TED Talks video this week, I also learned the importance of using images to get a message across. Despite all of my experience with media including an Adobe Photoshop class, generating my own memes and editing my own videos, I never knew about the existence of online photo-editors until this week. Honestly I found myself dreading the photo editing portion of this assignment because I am terrible at using Photoshop. Things became even worse for me after I tried using Pixlr and Photomonkey with no success. I was starting to become frustrated and think that to do even the most basic things, I would have to make a purchase. 
That’s when I got lucky and came across Picozu. This web app can be used both on a computer and a smartphone and allows for free advanced editing that for the most part, you could only find in Photoshop or Gimp. Picozu allows you to create unique images with advanced layering features and I found it quite easy to combine three images into one. By adjusting the lighting and contrast, and adding text with the app I was actually able to make the images look like they belonged together and create a powerful message. I found this app far easier to use than Photoshop, and I was relieved at how simple the whole thing wound up being. The message I created was inspired by the proverb “When the last tree has been cut down, the last fish caught, the last river poisoned, only then will we realize that one cannot eat money.” I made sure to give the image a bleak, sad look and worded the text as a question so it would feel like a call to action. Here is the image I created:


Sunday, September 17, 2017

Week #2 Copyright and Fair Use


Reflections on Copyright and Fair Use

Copyright ©


Definition: Copyright is the right that the creator of a work has to protect their work for a limited period of time.
Rights:Copyright holders have the right sell, redistribute,and publicly perform and display their works (Copyright Basics, n.d.).
Image retrieved from Wikimedia Commons
 Terms: Copyright holders have rights to their work for a certain period of time, and after that time those works become part of the public domain. Works in the public domain include United States works from earlier than 1923 and works earlier than 1978 with no copyright notice. Most government works as well as works that have exceeded 70 years after the death of the copyright holder are also part of the public domain (Copyright Basics, n.d.).
 Copyright laws can be very complicated and they are still developing. Some of these developments result from new loop hools and interesting trial outcomes. One example is the picture shown to the right. Since the monkey took its own picture, the image was determined not to be subject to copyright and now falls under public domain.


Fair use 
Image retrieved from Flickr
 Definition:
According to Stanford University Libraries "Fair use is the right to use portions of copyrighted materials without permission for purposes of education, commentary, or parody." (Stim, Rich, n.d.).
Details
Fair use protects the rights of the public by ensuring that they are free to express their thoughts and ideas on works as well as have access to facts. Fair use allows people to transform works and add new meaning and expression to them. A Wierd Al Yankovic song parody, a posting of a work for comparison or criticism, and the use of a portion of a work for educational purposes are all examples of fair use.


The Four Factors of Fair Use
Since fair use is situational, the four factors of fair use are helpful in determining whether or not it is legal to use a copyrighted work without permission. The four factors of fair use are 
  1. The Purpose and Character for which the work will be used
  2. The Nature of the Work to be used
  3. The Amount of Work that will be used
  4. The Market Effect the use will have on the work
If the work will be used for education, not for profit, for personal use, or in a small, insignificant quantity, there's a good chance that it falls under fair use (Copyright Basics, n.d.).

Deciding If a Situation is Fair Use 

Find Reliable Information
Image retrieved from Flickr
After getting mixed messages by reading blogs and discussions forums, I realized the importance of relying only on credible sources for information on copyright and fair use. For example, a blog site that I read explained that only in-class teaching qualified as an education exception and that online classes would not fall under fair use. I found this alarming because I have been sharing links in online courses for a long time. After reading information at https://kb.iu.edu/d/arit, I discovered that online courses could be determined to fall under educational fair use, but that it is safer to link to articles rather than copy/pasting because copyright laws have not caught up with online teaching (Posting Copyrighted Materials Online, 2017). I found that the best websites for finding information on copyright and fair use were .edu and .gov websites. 
I also found that if I am confused about what qualifies as fair use that there is a limitless abundance of resources that can be referred to for answers.  There are many websites that provide real life scenarios as well as court cases pertaining to fair use.
A couple of of these sites are http://fairuse.stanford.edu/overview/fair-use/cases/ and http://scholarspace.jccc.edu/cgi/viewcontent.cgi?article=1063&context=c2c_sidlit .

Evaluate the Risks and Consider the Four Factors
Through reading Purdue University and looking up fair use scenarios I also learned the importance of making sure that more than two out of the four fair use factors are covered before determining that the use of a work is fair. I gave an example in the class discussion forum about a situation where only having two of four factors covered could get someone into trouble. If it is too difficult to determine whether something is fair use or not using the four factors, it is safest to use public domain media or ask for permission.

Real Life Applications
For this class, the entirety of my academic career, and in future careers I will be encountering situations where I need to provide photos, videos, and examples from articles, books and websites. It will be my responsibility to ensure that any photos, videos and articles I use are consistent with fair use, and that nothing I use violates copyright laws. One such situation I faced was in a Website Development class I took. In that class I had to write the HTML and CSS for my own website on environmental issues and it had to be complete with photos, videos, and text content. When making this website I was sure to use only public domain information, videos and photos to avoid any unnecessary issues. At http://guides.library.harvard.edu/c.php?g=310751&p=2072820 links are provided to great public domain video and audio websites. Here's an example clip from UnRoyalty.com

What I'm Still Foggy About 

Image retrieved from Pixabay
While it is clear to me how copyright laws work and what constitutes copyright infringement, I still have many questions about copyright in an online setting and the specific rules and laws surrounding copyright ownership and transformative works.

For example, in my Website Development class I learned to copyright my webpages. If I create a website,get licensing agreements to use someone else's work,and I've referenced many articles for the content on my website do I own my website's code and design or or do I own the collective content in it?


Another thing I don't understand is the selling and gifting of copyrights. If someone decides to give their copyright to someone else does the copyright apply to 70 years after the new owners death,and could the selling and gifting of a copyright potentially go on forever? What are the limitations?

I also don't fully understand the copyright laws surrounding parodies. While I'm aware that parodies fall under fair use, is it possible for someone like Wierd Al Yankovic to copyright his parodies?

Works Cited


“Posting Copyrighted Materials Online.” Indiana University, 17 Jan. 2017, kb.iu.edu/d/arit. Accessed 16 Sept. 2017.


Stim, Rich. “Copyright and Fair Use.” Stanford University Libraries
fairuse.stanford.edu/overview/academic-and-educational-permissions/non-coursepack/. Accessed 16 Sept. 2017.

“Copyright Basics.” Purdue University, www.lib.purdue.edu/uco/CopyrightBasics/basics.html#1. Accessed 16 Sept. 2017.


“Copyright Basics.” Purdue University, www.lib.purdue.edu/uco/CopyrightBasics/fair_use.html. Accessed 16 Sept. 2017.